Many beginners are stepping into the world of self-guided travel in Japan, but without guidance, it’s easy to make mistakes!
Therefore, I decided to write a basic guide to share how beginners should plan their first self-guided trip to Japan.
Before diving in, there are 3 things you must not do if you haven’t done your homework:
1. Do not book low-cost carriers (LCC)
2. Do not book non-refundable hotels
3. Do not purchase any attraction tickets or transportation passes

3 Things You Must Not Do
The premise of these 3 things is “before you have done your homework,” do not do them.
If you have thoroughly prepared and are well-informed, then it’s fine. If not, it’s highly discouraged.
1. Do not book low-cost carriers (LCC)
Flying with low-cost carriers requires attention to many details. If you’re a beginner, you might not have enough experience to handle unexpected situations.
Frankly, even seasoned travelers can struggle with LCCs, so I strongly advise against beginners using them.
Of course, this doesn’t mean traditional airlines are problem-free, but the contingency mechanisms of LCCs and traditional airlines are different.
2. Do not book non-refundable hotels
Because non-refundable means non-refundable!
When booking hotels abroad, booking sites or hotels may offer cheaper rates, but they usually come with a “non-refundable” policy!
Some hotels might be flexible with date changes, but others strictly adhere to their policies, not allowing any changes or even resale, which can cause issues.
Therefore, I always prioritize options with later payment! Although the rates might be higher, it provides more flexibility for your trip.

3. Do not purchase any attraction tickets or transportation passes in advance
Many readers leave comments or send emails asking for advice after buying certain tickets and listing their planned attractions.
For example: someone buys a JR Kansai Area Pass for four days, but all their attractions are in Kyoto city;
or they buy a JR Kansai Wide Area Pass but plan to visit Shikoku?
Yes, I am just as puzzled.
They didn’t do their homework and ended up buying unrelated tickets, wasting money and causing inconvenience~
9 Steps to Plan a Self-Guided Trip
1. Choose Your Target Area
Japan can be divided into Hokkaido, Tohoku, Kanto, Tokyo (Capital Region), Chubu, Hokuriku, Kansai, San’in-Sanyo, Kyushu, and Shikoku.
Generally, beginners should choose just one area to focus on.
Personally, I think Tokyo and Kansai (Kyoto-Osaka) are more suitable for beginners; for Tokyo, just explore Tokyo Metropolis; for Kansai, just explore Kyoto and Osaka
If you’ve done enough homework, you can certainly expand your range, but the larger the area, the more preparation you’ll need
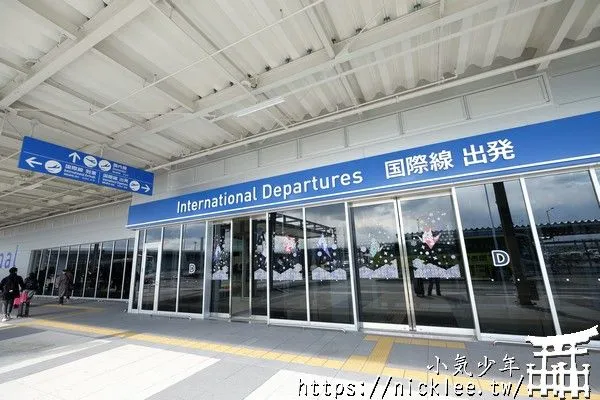
Once you’ve chosen your target area, find the appropriate entry and exit airports.
Tokyo has Narita Airport and Haneda Airport; Kansai has Kansai Airport.
2. Determine Your Travel Duration
The length of your trip depends on your budget and available time, as longer trips cost more, and your company might not allow extended leave.
Generally speaking, a 5-7 day trip is recommended.
This is because the first and last days are usually spent on flights, making it difficult to plan activities. So, after deducting these two days, the actual time available for sightseeing is limited.
3. Purchasing Air Tickets
When buying air tickets, it’s common to choose flights that depart early and return late. However, the earliest departure and the latest return are not always the best options, as you need to consider airport transportation.
Recommended departure time: 08:00-13:00
If your flight departs at 8 AM, you need to arrive at the airport before 6 AM. If you live far away, you’ll have to wake up even earlier. If your flight departs after 2 PM, you’ll arrive in Japan around 5 PM. This is fine in summer, but in winter, it will already be dark. For those unfamiliar with Japan, navigating at night can be challenging.
Recommended return time: 12:00-19:00
Since Japan is one hour ahead of Taiwan, the flight back to Taiwan takes about 3-4 hours (depending on the location). If you arrive in Taiwan after 11 PM, by the time you clear customs and collect your luggage, it could easily be past midnight. If you then drive home, you might not get to bed until 2 or 3 AM.
Therefore, it’s not advisable to book flights that arrive too late, especially if you have to work the next day.
Air Ticket Booking Websites
You can purchase tickets from a trusted travel agency. If you prefer to do it yourself, you can use the Funtime flight comparison website or buy directly from the airline’s official website.
When searching for flights, prioritize direct flights and avoid international layovers.
Although layovers might be cheaper, they consume a lot of time and may incur additional transportation and accommodation costs.
If you accidentally book a flight with a layover in China, you’ll need to spend extra money to get a Taiwan Compatriot Permit, which is quite troublesome.
■ Negative reviews shared by users on PTT
■ Negative reviews shared by users on DCARD

4.Researching Attractions and Food
Next, it’s time to do your homework.
Researching Attractions
Start by listing the places you want to visit. You don’t need detailed information yet, just a general idea of the city and how much you want to visit each attraction.
The purpose of listing attractions is to facilitate future itinerary planning (no need to list places you’re not interested in).
For example: Kyoto’s Kiyomizu-dera Temple – must visit, Himeji Castle in Hyogo – somewhat interested, Nara’s Todaiji Temple– must visit, Yasui Konpira-gu Shrine – optional.
Researching Food
The same goes for food. First, record the dishes you’re interested in, and then incorporate them into your itinerary later.

5. Finding Hotels
When looking for hotels, there are many considerations, such as whether to stay in the same hotel every night to reduce the hassle of moving luggage, though this might increase daily travel time. If you only change hotels once or twice, it can be difficult to plan activities during the moving process. Additionally, hotels with convenient transportation are usually more expensive; if you want to save money, you might have to spend more time on transportation. In short, it’s hard to find a perfect solution.
So, if it’s your first time in Tokyo, you can choose to stay in the same hotel every night. The ideal location is within Tokyo, near JR Yamanote Line or Tokyo Metro stations, within a 10-minute walk (within 600 meters from the station). I personally recommend staying in areas like Ueno or Asakusa.
If you’re in the Kansai region, it’s more relaxed to choose either Kyoto or Osaka, with only 2-3 days of intercity travel in between.
If you prefer changing hotels, that’s also an option. Personally, I like staying in Kyoto for the first few days and then moving to Osaka for the last few days (since shopping in Osaka is more convenient).
Recommended areas: In Kyoto, prioritize Kyoto Station (front or Hachijo exit) and Shijo Kawaramachi. Next, look around Shijo Karasuma, Gojo Karasuma, and Kawaramachi Sanjo.
In Osaka, recommended areas include Namba, Nipponbashi, Shinsaibashi, Tennoji, and Umeda.
At this stage, don’t rush to book a hotel. Just record the ones you like. If you do book in advance, make sure not to choose non-refundable options to keep your plans flexible before departure!
As for booking hotels, I often use these websites: AGODA, Booking.com, and JAPANiCAN. You can refer to them.
When booking, besides the price, pay attention to room size, room type, transportation, and related public facilities. The size of the room matters. For a double room, it is recommended to have at least 16㎡. In Tokyo, some hotels offer double rooms that are only 11~12㎡, which means you might end up having to open your suitcase on the bed!
(Even 16㎡ is quite small)

6. Plan Your Daily Itinerary
For first-time travelers to Japan, it’s easy to overpack your schedule, thinking you can handle it all. However, by the first or second night, you’ll likely be exhausted.
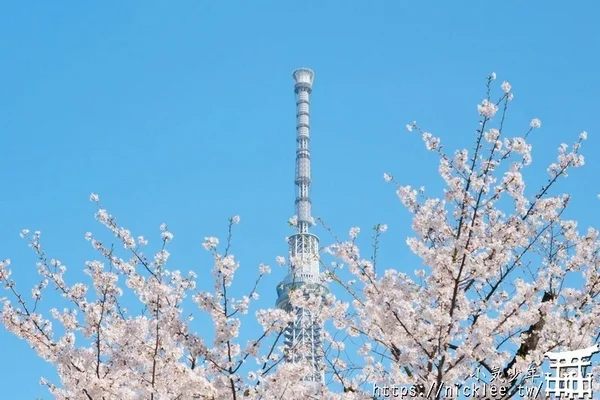
I suggest planning 2-3 attractions per day. If you’re visiting during sakura or autumn foliage seasons, you can add one more night-time spot for viewing, depending on your stamina.
So, how should you plan?
Start by listing out the “places you want to visit” and the “foods you want to try.” Group the attractions and eateries in the same city or area together.
Then, research the location and transportation methods (tools and routes) for each spot.
Finally, arrange the attractions and eateries according to the transportation routes for each day’s itinerary.

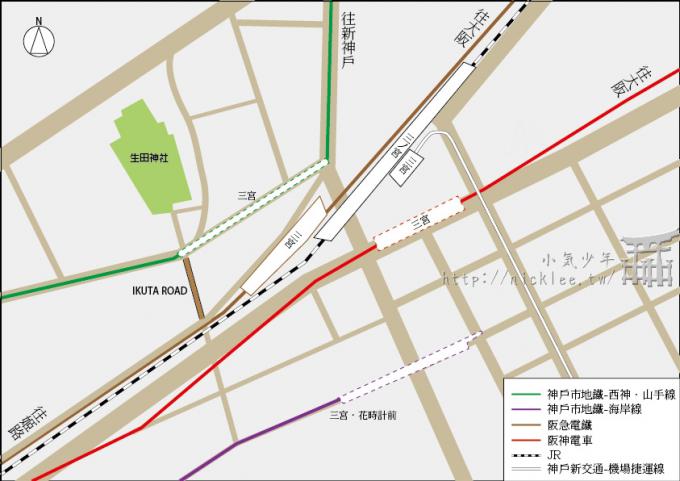
7. Research Daily Transportation Routes and Fares
a. Understand the Structure of Japanese Train Tickets
b. Familiarize Yourself with the Transportation You’ll Use During Your Trip

c. Check Daily Fares and List Them
Once you’ve researched the transportation routes, the next step is to investigate the fares.
I generally recommend using Japan Yahoo to check transportation routes and downloading this convenient app for route searches: Y!乗換案内
Additionally, when checking transportation routes, don’t just record the fares. Also note the type of transportation you’ll be using.
Is it a subway, JR, or another private railway? Record this clearly and sum up the daily fares.
d. Research Transportation Passes
Finally, research suitable transportation passes!
Recommended passes are detailed in the Kansai Transportation Guide and Tokyo & Kanto Guide.
However, before diving into that, I suggest buying a Suica card in Tokyo or an ICOCA card in Kansai.
These transportation IC cards can be used for public transport and shopping, making travel convenient.
Remember, the purpose of buying a pass is to save money or for convenience. Decide for yourself; there’s no rule that you must buy a certain pass for your trip.
Some people prefer the convenience of going anywhere without worrying about fares and use a pass for everything.

8. Review and Adjust Your Daily Itinerary
After researching daily transportation routes and fares, and deciding on the transportation passes, take a step back and look at the overall plan to see if any adjustments can be made.
Sometimes, reviewing the itinerary later reveals better routes!
Additionally, weather is unpredictable. I always check the weather forecast during my trips and adjust my plans accordingly. If the weather is good, I’ll visit more photogenic spots. If it’s bad, I’ll opt for indoor activities or less interesting attractions.
Don’t stick rigidly to your plan unless you’re moving to another city.
9. Pre-Departure Preparations
There are many things to prepare before departure, such as purchasing transportation tickets, internet SIM cards, travel insurance, Visit Japan Web, Japanese yen, credit cards, checking the weather, and travel clothes.
Most of these items I prepare at least 1-2 weeks before departure, and the rest I handle in the last three days.
■ Purchasing Transportation Tickets
I usually prepare my transportation tickets two weeks before departure. I mainly buy my tickets on KKDAY and KLOOK.
I don’t have a fixed platform; I buy from whichever travel agency offers the best price.
■ Internet SIM Card
To reduce the weight I carry during travel, I now rarely use pocket WiFi.
Currently, SIM cards are available through DJB and WIHO, both offering physical SIM cards and eSIMs. My recommended plans are as follows:
eSIM: DJB’s Unlimited Japan Card Plus, Wi-Ho’s Budget eSIM 6-day plan with 1GB per day
Physical SIM Card: DJB Unlimited Japan Card Plus, Wi-Ho Japan 5-day or 8-day versions
Note!! In Taiwan, eSIM is currently only available for iPhone and Google Pixel phones. Please check your user manual for other phones.
(Most Samsung phones do not support eSIM; currently, only a few models do.Galaxy Z Flip)
■ Travel Insurance
If you don’t understand travel insurance, you can first read this article: Essential Knowledge for Self-Guided Travel – Travel Insurance and Don’t Get Burned!! Travel Inconvenience Insurance May Not Always Cover You
For travel insurance, purchase from a “property insurance company” rather than a “life insurance company”, because life insurance companies do not sell travel inconvenience insurance (if they do, it’s as an agent), and travel inconvenience insurance cannot be purchased separately.
When buying, I recommend purchasing at least a week before your trip, so if you make a mistake, you can still change it before departure.
Although insurance companies claim you can change it before departure, in reality, cancellations need to be handled during regular business hours, and customer service at night may not be able to assist you. If you have an early flight the next day, you might not be able to cancel in time.
Additionally, each property insurance company has different advantages; some are cheaper, some are more expensive. The more expensive ones have their reasons, so do your research!
■ Japan Entry Requirements: Visit Japan Web, Japan Entry Card
To travel to Japan, you need to fill out entry information for Japanese authorities to review.
You can choose to use either Visit Japan Web or the Japan Entry Card. Each method has its conveniences, depending on individual preferences.
Visit Japan Web can be filled out in advance on your phone, while the Japan Entry Card can only be filled out after receiving it on the plane.
Which is better? Personally, I prefer using Visit Japan Web, but choose whichever method is more convenient for you!
■ Japanese Yen and Credit Cards
Credit cards and electronic payments (AllPay, E.SUN Wallet, JKO Pay) can now be used with PayPay in Japan,
but occasionally you still need Japanese yen. I recommend preparing some cash, which you can exchange at your familiar bank.
Also, remember to set your ATM card to allow overseas cash withdrawals, just in case!
As for credit cards, there are many reward programs, and they change every season.

■ Checking the Weather
I personally use Japan Yahoo Weather Forecast because it’s convenient to find.
Since you need to check the weather before departure and during the trip, it’s good to have a reliable source.
However, I think weather forecasts are just for reference. They are usually more accurate for the next day, and forecasts for 2-3 days later are just for reference.

■ Travel Clothes and Other Related Items
This part is more complicated because there are many things to prepare. It’s best to have a checklist to help you avoid forgetting anything.
I always make a checklist and check it before every trip to ensure I don’t forget anything.
Additionally, if you’re planning to visit Japan in winter, you’ll need to prepare a coat. It’s best to start this preparation a month in advance rather than waiting until the last minute, as you might run out of time.
For items that are rarely used, such as crampons or trekking poles, the earlier you prepare, the better.
Summary of How to Plan Your First Self-Guided Trip to Japan
This article aims to provide beginners with some advice and direction. By following these steps, you can save both time and money.
Moreover, these nine steps are not set in stone and can be adjusted as needed. Some steps may require frequent review and adjustment (rolling adjustments?).
For instance, even after booking a hotel, I occasionally check to see if there are better options available.
Sometimes, you might come across special promotions on booking websites, allowing you to book a cheaper hotel!

『Original Source:https://dio.duq.mybluehost.me/sites/vibedaily.io//nicklee.tw/3128/first-self-tour/』