Summary
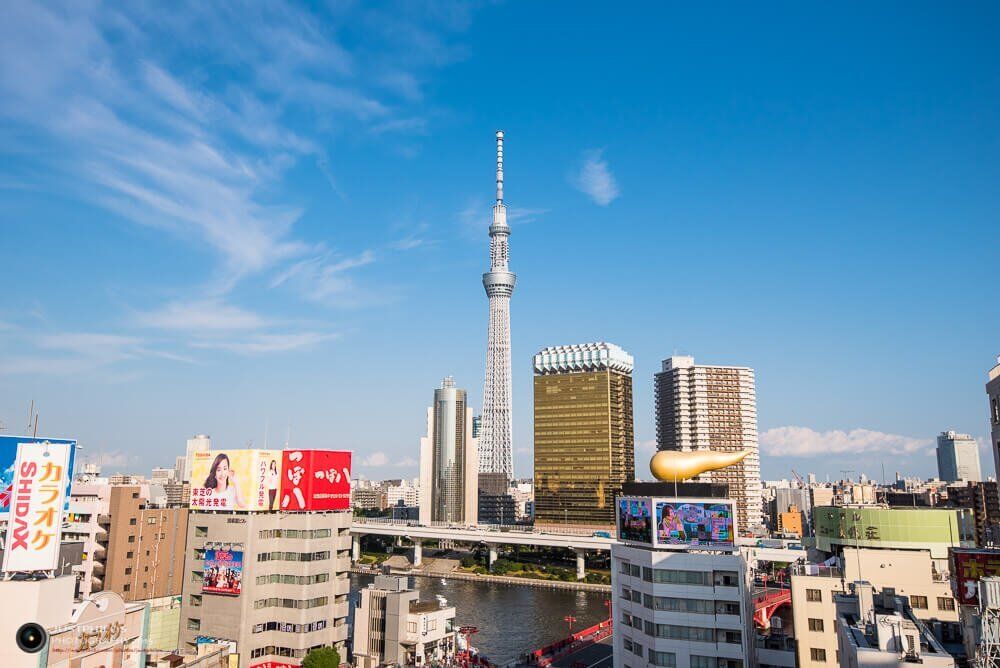
Tokyo Skytree is the tallest building in Japan and a landmark of Tokyo. You can see the towering figure of the Skytree from almost any corner of Tokyo. If you come to Tokyo and don’t visit the Skytree in Asakusa, it’s like going to Taipei without visiting Taipei 101. From different angles in Asakusa, you can see different views of the Skytree. This time, we visited nine photography spots in Asakusa by bicycle to experience the beauty of Tokyo Skytree. Originally, this bike trip was almost canceled due to bad weather, but I can only say that the weather cleared up on the last day, and with the delay of the flight back to Taiwan due to a typhoon, we successfully completed this bike trip to Tokyo Skytree. We took photos from around 3 pm to 6:30 pm. Before the trip, we referred to Amanda’s article, but because you can only know some details by actually walking the route, we decided to write a separate article to explain the shooting spots.
First, here is a map of the bike ride and the shooting spots (camera icons) (click here to see the large map)

Here is a brief explanation of renting bicycles:
It’s easy to rent a bicycle in Asakusa. Just head towards “Sumida Park” and you will see a bicycle rental station at the south exit of the parking lot (you need to walk down).
This is the rental station closest to the Taito area. There are also other rental points:
To rent, simply fill out a rental form and have your passport ready for verification (remember to take your passport back). The cost is 300 yen (there doesn’t seem to be a difference between 4 hours and a full day). When taking the bike upstairs, just place it on the conveyor belt and it will be transported upstairs. Don’t be silly and carry it up yourself. After renting the bike, you can start your ride!
Shooting Spot 1: On Azuma Bridge

Of course, you can also take photos in “Sumida Park” across from Azuma Bridge, but I think it’s nice to have a bit of the bridge in the scenery.
Shooting Spot 2: Behind Asahi Beer Building

We actually had a bit of trouble finding this spot because it’s called “behind the Asahi Building.” To be more precise, after crossing Azuma Bridge, you need to climb up to the platform of the Asahi Building and go to the end of the platform, which is the spot behind the Asahi Building. However, because there is no place to park the bikes, be careful not to park them randomly.
Shooting Spot 3: Alley near Sumida Ward Office

Not long after leaving the Asahi Building, ride along the alley to the left of “Sumida Ward Office” to reach the third shooting spot. I really like the atmosphere of this narrow alley.
Shooting Spot 4: On Minamisen Bridge

This is a spot that many photographers know. Ride straight from the alley mentioned in “Shooting Spot 3” until you reach a major road, then turn left and cross to the opposite side of the road. You will be able to see it from there. This is a well-known spot for taking photos of the JR line and the Skytree for magazines.
Shooting Spot 5: In Front of Oshiage Station

This spot is not mentioned in Amanda’s article, but I think it’s a good spot. After crossing Minamisen Bridge, go through the elevated bridge over the railway and turn right. It will take about 2-3 minutes of riding to reach Oshiage Station. From this spot, you can directly look up at the towering Skytree from below, just like standing under Taipei 101, it’s quite spectacular.
Shooting Spot 6: Photography Square next to Oshiage Station

After passing Oshiage Station, turn right and ride along the railway. Then turn right again to reach this shooting spot. Actually, I couldn’t find the so-called “photography square” here, but because there are many high points for photography, you can still capture similar views.
Shooting Spot 7: On Keisei Bridge, Shooting Skytree and East Tower

After leaving the previous shooting spot, turn back and return to the main road, then turn right and ride a short distance to reach Keisei Bridge. We arrived here around 5:30 pm, so there was already some sunset glow.
Shooting Spot 8: On Nishi-Jukken Bridge

After crossing Keisei Bridge, turn left and cross the road. Ride along the small alley next to the river to reach Nishi-Jukken Bridge. This spot is mainly for capturing the reflection of the Skytree on the river.
Shooting Spot 9: On Jukken Bridge

After leaving Nishi-Jukken Bridge, ride a little further south to reach Jukken Bridge. This is probably the best place to capture the Skytree in its entirety. However, when I went, it was under maintenance, so I had to avoid some scaffolding when taking photos…
Finally, the map section uses a large map. Feel free to download it for your own use (click here to see the large map)
If you repost, please remember to indicate the source. I hope this route will help you better understand the shooting spots!